
Watch the Video Tutorial
This little bear keychain is a round, sleepy-faced bear worked in single crochet. Two little legs are joined into one body, the arms are worked right into the round, and you add two small ears and an embroidered face with pink cheeks. It hangs from a keyring or a bag zip, and it makes a sweet little gift.
Watch the video, then use the written steps below. They are the video’s own subtitles, word for word, so you can follow along at your own pace.

What You’ll Need
Yarn: 4-ply milk cotton yarn (golden brown in the video), plus black yarn for the face (the video splits the 4-ply into 2-ply).
Hook: a 2.0mm crochet hook.
You’ll also need: a stitch marker, filling (stuffing), a yarn needle for sewing, and a keyring or clasp to hang it on.
Shop the supplies: 4-ply milk cotton yarn · 2.0mm crochet hook · stitch markers · fiberfill stuffing · keychain clasps
As an Amazon Associate I earn from qualifying purchases, at no extra cost to you.
Step-by-Step: The Video Subtitles
These are the video’s subtitles, copied word for word. The video has no chapters, so they are split into four parts, each with the time it starts in the video.
Part 1 (0:00)
Hello everyone, today I’ll share this
little bear keychain pendant.
We’ll use 4-ply milk cotton yarn
and a 2.0mm crochet hook.
Start with a magic ring.
Loop the yarn and make a slip knot.
Crochet 6 single crochets into the ring.
After finishing, tighten the tail.
For Round 2, insert into the first stitch.
Place the yarn over the hook and pull through.
Make a slip stitch.
Then yarn over for a chain stitch.
Re-enter the first stitch.
Crochet 1 single crochet into the first stitch.
Mark the first stitch with a stitch marker.
For the second stitch,
make a single crochet increase (2 stitches in one).
Work 2 single crochets into the same stitch.
Repeat this pattern (1 sc, 1 inc)
for a total of 3 sets.
After this round, you’ll have 9 stitches.
Note: The slip stitch and chain don’t count as stitches.
Insert into the first stitch again,
yarn over for a slip stitch.
Flip it over,
then chain 1.
Cut the yarn tail.
Make another identical piece,
but don’t cut the yarn—we’ll join the two pieces.

Part 2 (1:37)
Insert into the first stitch here,
yarn over and pull through.
Pull the yarn through,
make a slip stitch.
Then chain 1.
Re-enter the first stitch,
crochet 1 single crochet.
This is the first stitch of Round 3.
Always mark the first stitch of each round.
Work 9 single crochets into the left piece.
After completing 9 sc on the first piece,
if you directly crochet 9 sc
on the second piece,
the gap will be too wide
and the stuffing may show.
So after the first 9 sc,
pick a spot nearby
to make a slip stitch,
then continue with the second piece.
Insert into the second piece
and work another 9 sc.
1,
2…
Now both pieces have 9 sc each,
totaling 18 stitches for Round 3.
For Round 4, slip stitch into the first stitch,
chain 1,
then 1 sc in the first stitch.
Mark the first stitch.
In the second stitch,
make a single crochet increase (2 sc).
Third stitch:
1 sc,
then repeat (1 sc, 1 inc)
for 6 sets (24 stitches total).
Continue with 1 sc,
then 1 inc.
Rounds 5–6: 24 sc per round.

Part 3 (3:25)
Round 7:
First, 5 single crochets.
Then yarn over,
and make 4 unfinished double crochets in the next stitch.
1,
2,
3,
pull through the first 2 loops each time.
4, then yarn over and pull through all loops.
Next stitch:
12 single crochets.
After these sc, yarn over
and in the next stitch,
make 4 unfinished double crochets
for the other arm.
Pull through all loops.
Continue with
2 single crochets.
1,
2,
3,
4,
5. After these 5 sc,
Rounds 8–11: 4 rounds of 24 sc each.
(24 stitches per round).
Round 12: Slip stitch into the first stitch,
chain 1,
1 sc in the first stitch.
For the second
and third stitches, pick the front loops only,
yarn over and pull through,
then yarn over to complete the decrease.
Third stitch:
1 single crochet.
Repeat (1 sc, 1 dec, 1 sc)
for 6 sets
(18 stitches total).
Continue decreasing until Round 14.
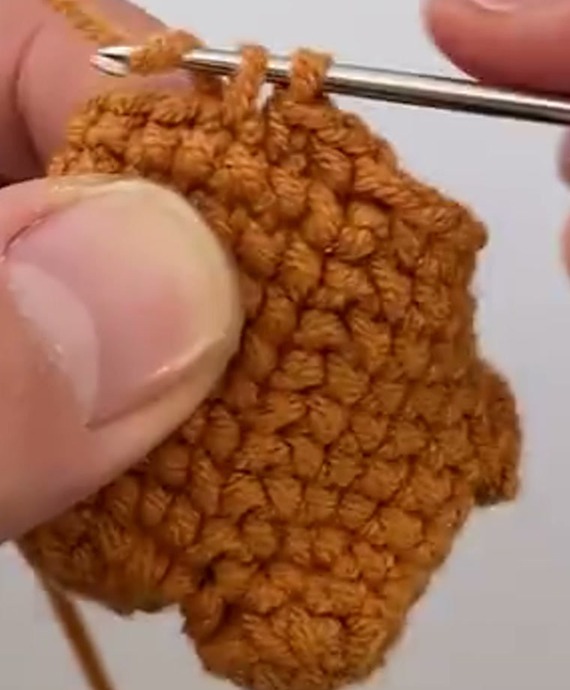
After Round 13, stuff with filling.
Round 14: 6 decreases, then
slip stitch into the first stitch,
pull through,
and cut the yarn.
Leave a tail to sew the opening closed.
Sew the gap shut.
Part 4 (6:06)
For the ears: Start with a magic ring,
make a slip knot,
and crochet 6 sc into the ring.
Tighten the tail after finishing.
Leave a tail and cut the yarn.
Weave in the short tail.
Make 2 identical ears.
Sew them between Rounds 1–2
on both sides
near Round 4.
Use black yarn (split 4-ply into 2-ply) for the face.
Start from the bottom,
aligning with the arms.
Stitch 3 dots in a row for the mouth.
Pull through to the back.
Move to the next spot
and secure with a knot.
Weave in the ends.
Re-enter the same spot
to embroider blush on the cheeks.
Now the little bear is complete!

Stitch count check (added by DailyCrochet)
Not part of the video. Our own count of each round/row, worked out from the subtitles above.
| Round / row | Stitches | How it is worked out |
|---|---|---|
| Round 1 (each leg) | 6 | “Crochet 6 single crochets into the ring” = 6 |
| Round 2 (each leg) | 9 | (1 sc, 1 inc) x 3 = 3 x 3 = 9 (the video: “After this round, you’ll have 9 stitches.” The slip stitch and chain don’t count.) |
| Second leg | 9 | “Make another identical piece” = 9, the same as the first leg |
| Round 3 | 18 | 9 sc on the first piece + 9 sc on the second piece = 18 (the video: “totaling 18 stitches for Round 3”) |
| Round 4 | 24 | 6 sets, each with 1 increase: 18 + 6 = 24 (the video: “for 6 sets (24 stitches total)”) |
| Rounds 5–6 | 24 | “Rounds 5–6: 24 sc per round” = 24 |
| Round 7 | not stated in the video | 5 sc, 4 unfinished double crochets in one stitch (first arm), 12 sc, 4 unfinished double crochets in one stitch (other arm), then the video says “2 single crochets”, counts 1 to 5 and says “After these 5 sc”. The video gives no total for Round 7. If each arm counts as one stitch, 5 + 1 + 12 + 1 + 5 = 24, the same as Rounds 8–11, but the video does not say this. |
| Rounds 8–11 | 24 | “4 rounds of 24 sc each” = 24 |
| Round 12 | 18 | (1 sc, 1 dec, 1 sc) x 6 = 6 x 3 = 18 (the video: “(18 stitches total)”), worked over 6 x 4 = 24 stitches of the round before |
| Round 13 | not stated in the video | “Continue decreasing until Round 14.” The video does not give the stitches for Round 13. |
| Round 14 | not stated in the video | “Round 14: 6 decreases”. The video does not give the total after this round. |
| Ears (make 2) | 6 | “crochet 6 sc into the ring” = 6 |
Crochet Mini Bear Keychain Tips
- Mark the first stitch. The video says to always mark the first stitch of each round with a stitch marker.
- The joining stitches don’t count. The slip stitch and chain at the start of a round don’t count as stitches.
- Close the gap between the legs. After the first 9 sc, the video makes a slip stitch nearby before going on to the second piece, so the gap is not too wide and the stuffing does not show.
- Stuff before you close. Stuff the bear after Round 13, then work Round 14 and sew the opening shut.
- Thin yarn for the face. Split the black 4-ply into 2-ply for a neater face.
More Keychains to Crochet
Want another quick keychain? Try the Crochet Flower Keychain, the Crochet Smiley Face Keychain, the Crochet Fish Keychain or the Crochet Butterfly Keychain. Need a strap to hang it on? Make the Crochet Cord Keychain Strap. Love bears? See the Crochet Bear Coaster and our Crochet Teddy Bear Free Patterns.
Want more free patterns delivered to your inbox? Join the Cozy Stitch Newsletter — new patterns every week.
Happy hooking!


